Apply Discount Code
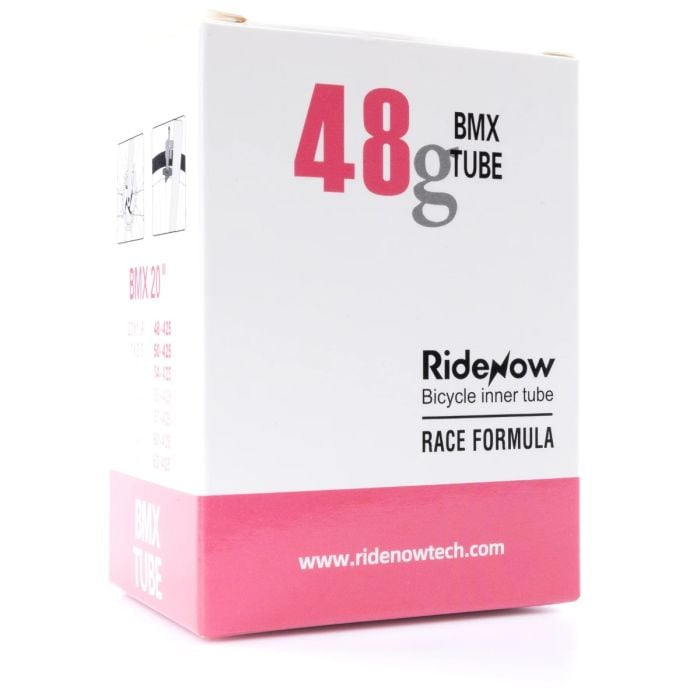
RideNow Super Light Inner Tube
As low as £14.99
SKU
RDNW-SPLT-TUBE
What sets the RideNow tubes apart from other options is their sheer performance. They are 2-5 times lighter than butyl and latex inner tubes. Lighter, stronger, but also faster... Read More.....
We are finally in the age where the humble inner tube is being disrupted by innovation and technology. The bike industry has relied on butyl inner tubes for its low cost, relative reliability, and adequate performance since one can remember. However, we are now in the age of TPU inner tubes!
What sets the RideNow tubes apart from other options is their sheer performance. They are 2-5 times lighter than butyl and latex inner tubes.
Lighter, stronger, but also faster!
Click below for RideNow Patch Kit
Features:
- Weight savings - Save up to 200 grams compared to standard inner tubes.
- Puncture resistance - Higher puncture resistance and lower rolling resistance than standard inner tubes
- Cost effective upgrade – RideNow inner tubes are the most affordable TPU inner tubes!
- Space saving - Compact size allows you to carry more with less space taken up.
Specification:
20” x 1.9” – 2.5”: (Schrader)
- Weight: Actually 42 grams! Not 48 grams!
- Valve Type: 45mm Schrader
- Valve Colour: Black
- Width: 20” x 1.9” – 2.5”
18” x 1.9” – 2.5”: (Schrader)
- Weight: 40 grams
- Valve Type: 45mm Schrader
- Valve Colour: Black
- Width: 18” x 1.9” – 2.5”
16” x 1.9” – 2.5”: (Schrader)
- Weight: 24 grams
- Valve Type: 45mm Schrader
- Valve Colour: Black
- Width: 16” x 1.9” – 2.5”
HOW TO TAKE CARE OF TPU TUBES - INSTALLATION AND MAINTENANCE.
As a prerequisite, you must rim tape with your wheel prior to installing TPU inner tubes. TPU tubes installed directly on the rim surface is more prone to contact with debris and heat imbalances which can damage the tube and cause irreversible damage. Installation without rim tape will immediately invalidate any warranty claims. For tubeless ready rims, tubeless rim tape can also perform even better than traditional rim tape.
- Prior to installing the RideNow inner tube, carefully inspect the inner wall of the outer tire, rim, spoke ends, and rim tape for any sharp objects that could cause punctures or tire bursts.
- Even when using tubeless wheel sets, it is essential to use the appropriate size of rim tape and ensure correct installation.
- Before inflating the RideNow tube, turn the valve inward (towards the center of the tire circle). Inflate it slightly until the inner tube takes on a rounded shape, with a pressure not exceeding 0.5 bar/8 PSI. Make sure to slightly inflate the inner tube before proceeding with the following installation steps.
- When installing the outer tire, ensure that one side of the tire extends beyond the outer rim edge, then insert the inner tube into the outer tire. Confirm that the inner tube is free from twisting or being pinched between the rim and the outer tire. Also, verify that the nozzle valve aligns with the rim nozzle hole and remains vertically positioned.
- Avoid using sharp or pointed tools during inner tube installation, as these may damage either the inner tube or the outer tire, potentially leading to air leaks after use or inflation. Begin by pulling the protruding side of the outer tire near the air nozzle over the rim flange until the entire outer tire securely attaches to the rim. Ensure there is no compression of the inner tube, and that it remains crease-free.
- Roll the partially inflated tire on the ground to release any potential folds caused by squeezing. Gradually inflate the tire, ensuring that both sides of the outer tire evenly adhere to the rim during inflation. Take care not to exceed the maximum allowable pressure of the rim, rim tape, and outer tire. It is important to check the tire pressure before every ride. In case of an inner tube leak or a repairable puncture, you can use the RideNow tire repair kit, complete with usage instructions. Do not attempt to repair the RideNow inner tube with any other tire repair products, as they may not adhere properly and may not prevent air from escaping through the puncture.
When inflating a TPU inner tube outside the tire, it is imperative to inflate no more than 0,5bar/8psi. Beyond that, it may lead to blistering, blistering of the tube which will render it unusable.
If you can take care and pay attention to the above, you will minimise the chances of malfunction and enjoy your TPU inner tube for a comparable period to standard butyl tubes.
- Lead Time: 0
Write Your Own Review
Only registered users can write reviews. Please Sign in or create an account
People also bought


New Rider?
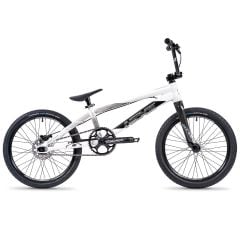
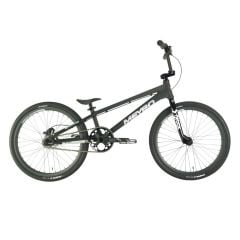
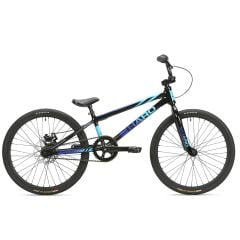
FREESTYLE VS RACING BMX BIKES?
Choosing the correct bike for your discipline is extremely important, and sometimes for those new to the sport it can be difficult to know or decide, so we’ve broken down the main differences to help you make a decision.
Freestyle bikes are designed for the skatepark, the streets or the trails. They are constructed from strong, hard wearing materials and usually feature Steel or Chromoly frames. This means that the bike can stand up to a certain amount of impacts and hard landings, but remember no bike is indestructible. For riders looking to learn tricks and stunts, then a freestyle bike is the correct choice.
Race bikes are designed specifically with the track in mind, they are nimble lightweight machines for putting down quick lap times. Typically, they are constructed from lightweight materials like aluminium and carbon fibre to keep the weight down and the rider at the front of the pack. These bikes are strong enough for smooth landings on race and pump tracks but will not take the abuse that a freestyle bike would in concrete skateparks. If you’re looking to set fast lap times or begin your competitive career on the track, a race bike is the right choice.
WHAT SIZE BIKE WOULD I NEED?
Choosing the correct size BMX bike is very important, bikes that are too large will be cumbersome and hard to manoeuvre and bikes that are too small can feel cramped and hard to keep under control.
Youth freestyle bikes are sized depending on the diameter of the wheel staring at 12” all the way through to 18”, at a 20” wheel the bike is considered an adult size. Adult freestyle bikes are sized on top tube length, a 18.5” top tube is extra small for younger teenagers who have just moved up to an adult bike, a 20” top tube is small, 20.5” a medium and anything over a 21” is considered large.
Race bikes feature 20-inch wheels on all models, but the components and frame are sized dependent on age and height. Youth race bikes start from a Micro size for very young riders and offer a range of sizes through to expert XL. Pro size and upwards are considered adult bikes and are usually offered up to a Pro XXXL or larger for very tall riders.
We recommend consulting our height charts from the link below to help you choose your perfect sized bike:
WHAT LEVEL DO I NEED?
Choosing the right level bike for your riding ability is important. Components that are not suitable for your level of riding can wear or fail much sooner than expected. Although BMX bikes can look very similar, under the surface components and materials used can vary greatly.
All our bikes are cherry picked from the very best BMX specialist brands, and all our bikes are designed specifically for use at the skatepark or on the track.
FREESTYLE BIKES
For first time riders new to the sport our entry level bikes, priced from £200-£400, are perfect, most of these are made from high tensile steel which means they are still relatively strong, but can be slightly heavier than higher end models. You might find you’ll want to upgrade to something lighter sooner than you’d think. If you are planning on using the bike in rain or bad weather, we do strongly advise choosing a model with fully sealed bearings all round.
If you are already confident on a bike and have some experience in skateparks or performing tricks and jumps then we would recommend choosing a mid-range bike, priced from £400 to £700, with a full Chromoly frame, fork, and bars. This will be lighter and stronger than an entry level model.
For an experienced person that is already capable of performing most tricks and has previously owned BMX bikes then a high-end complete bike, or full custom would be suggested to meet the demands of this rider, these bikes are priced from £700 plus.
RACE BIKES
Our range of entry level race bikes are perfect for first time racers, usually priced between £200 and £400 most of these are constructed of heavier steel rather than aluminium. These are great to get a feel for the sport but would not be able to keep up in a competitive environment.
Our mid-range race bikes are the perfect for riders who are beginning their path to competitive racing. Priced between £400 and £800 these are not quite the high-end steeds you see at national level races, but they all feature lightweight aluminium frames and are designed specifically with the racetrack in mind.
For experienced riders who are already racing confidently at a competitive level we offer a small range of high-end complete bikes. These are usually priced between £800 and £1500 and feature many aftermarket components like carbon forks, disc brakes and folding tyres. However, at this level we highly recommend building a full custom bike, usually costing between £1500 and £3000 all components can be chosen specifically with the rider in mind. For help on building a custom bike give us a call or drop us an email!
CASSETTE OR FREECOASTER
One of our most frequently asked questions in freestyle is, which rear hub do I want, a freecoaster or a cassette? Most experienced riders know their preference, but if you’re new to the sport it can be difficult to know which choice to make.
The main difference between the two is the way the bike performs when going backwards. A traditional cassette hub requires the rider to pedal in time with the rotation of the wheel while travelling backwards, while a freecoaster allows the rider to travel backwards while keeping the pedals level in the same position as riding forwards.
Although this may seem like a brilliant feature, it does come at a price! Freecoaster hubs feature a “Slack” before engagement while pedalling forward. This means that you can turn the crank a set amount (Usually an adjustable amount) before the drivetrain engages. This is referred to as the “Slack”, when riding backwards you must keep your feet positioned within the slack, if your pedals rotate too much the drivetrain will engage and your pedals will start to rotate. The smaller the slack, the harder it is to keep your pedal positioned within it while riding backwards. This means that certain tricks are harder to perform, especially those that rely on pedal pressure, for example Tire Taps.
